Table of Contents
ToggleHorizontal wall decor solves a problem most homeowners don’t realize they have: acres of blank wall with nowhere to anchor the eye. Wide-format art, shelving, and decorative panels create visual flow in spaces where traditional vertical pieces fall flat. Whether it’s a stretched canvas above a sofa or a series of floating shelves spanning a hallway, horizontal elements tie a room together by mirroring the natural sight lines people use when scanning a space. This guide walks through the practical side, choosing the right format, hanging it securely, and even building your own.
Key Takeaways
- Horizontal wall decor naturally guides the eye across spaces, making rooms feel wider and more spacious by mirroring how people naturally scan a room from left to right.
- The ideal horizontal wall decor piece should span 66–75% of the furniture width below it, with the center hung at 57 inches from the floor for optimal visual balance.
- Floating shelves over 36 inches require center support to prevent sagging, and all heavy pieces (over 20 pounds) must be anchored into wall studs with appropriately rated hardware.
- Grouping three to five pieces in horizontal arrangements creates visual rhythm and feels more dynamic than even-numbered groupings when spaced consistently 3–4 inches apart.
- DIY options like reclaimed wood planks, fabric-wrapped panels, and three-panel canvas prints offer budget-friendly ways to achieve horizontal wall decor without breaking the bank.
- Use paper templates and painter’s tape to test your horizontal wall decor layout for 1–2 days before permanent installation to avoid costly drywall patching.
Why Horizontal Wall Decor Works in Modern Interiors
Horizontal decor follows the way people naturally look at rooms. Eyes move left-to-right before up-and-down, so wide-format pieces feel intuitive. They ground furniture groupings, especially low-profile sofas and platform beds, by echoing the horizontal lines already present.
In open-plan homes, horizontal elements create implied boundaries without physical dividers. A long shelf or stretched canvas visually separates a dining area from a living space, adding definition without blocking light or sightlines.
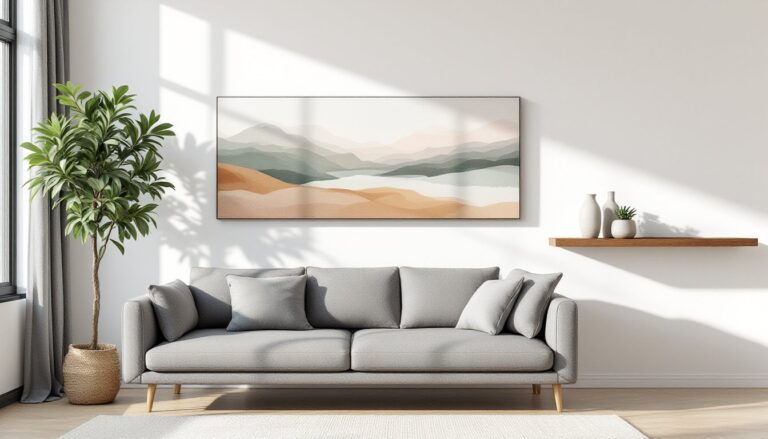
Technically, horizontal decor increases perceived room width. A 60-inch-wide canvas hung above a console makes a narrow entryway feel broader. This works best when the piece spans two-thirds to three-quarters of the furniture width below it, anything less looks disconnected: anything wider overwhelms.
Ceiling height matters. In rooms with standard 8-foot ceilings, vertical art can emphasize the short height. Horizontal pieces keep the eye moving laterally, de-emphasizing the ceiling and making the room feel more spacious rather than taller.
Best Types of Horizontal Wall Decor for Every Room
Living Room and Open Spaces
Living rooms handle bold, oversized pieces. Canvas prints and framed photography in panoramic formats (24″ × 60″ or larger) anchor seating areas. Stretched canvases require minimal framing, just gallery-wrapped edges stapled to 1.5-inch stretcher bars.
Floating shelves in horizontal runs work well for rotating displays. Use ¾-inch plywood or solid wood with hidden bracket systems rated for at least 50 pounds per shelf. Install into wall studs with 3-inch wood screws or toggle anchors in drywall. Shelves spanning more than 36 inches need a center support to prevent sagging.
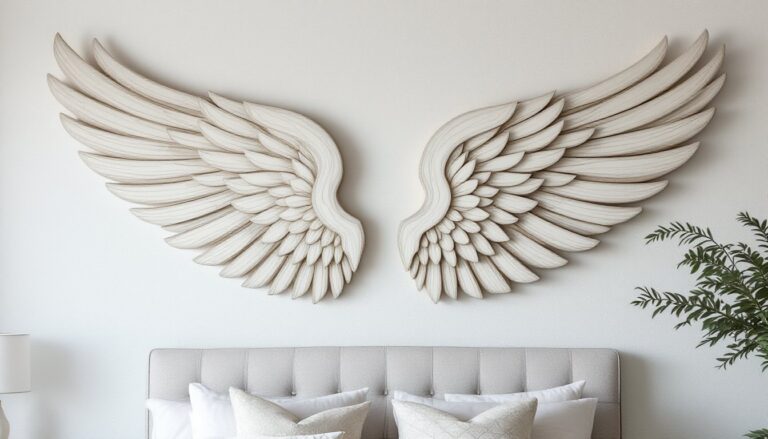
Metal wall sculptures and wooden relief panels add texture. Look for pieces with integrated keyhole hangers or D-rings on the back. For anything over 20 pounds, locate studs with a stud finder and use #8 or #10 wood screws driven at least 1.25 inches into the framing.
For spaces with home gym wall decor, motivational typography or streamlined metal art maintains focus without visual clutter.
Bedrooms and Hallways
Bedrooms benefit from softer, lower-profile decor. A single wide canvas or a diptych (two-panel set) above the headboard creates a focal point without crowding the space. Keep the overall width within 50-70% of the bed width, anything wider risks looking unbalanced.
Hallways are prime real estate for gallery-style runs. Three to five framed prints mounted in a horizontal line at consistent spacing (typically 3-4 inches apart) create rhythm. Use a laser level to mark centerlines: even slight tilts are magnified in narrow corridors. Frame depth matters, stick with ¾-inch to 1-inch frames to avoid pieces jutting too far from the wall in tight spaces.
Wood plank installations (shiplap, reclaimed boards) add warmth and work especially well in transitional or farmhouse interiors. Use construction adhesive and 18-gauge brad nails into studs. Let wood acclimate to indoor humidity for 48-72 hours before installation to minimize expansion or contraction.
How to Choose the Right Size and Placement
Start with the furniture below. Measure the width of the sofa, console, or bed, then multiply by 0.66 to 0.75. That’s the target width for the decor piece or grouping.
Hanging height follows the 57-inch rule: the center of the artwork should sit 57 inches from the floor, which aligns with average eye level. For pieces above furniture, leave 6-10 inches of clearance between the furniture top and the decor bottom. Any closer feels cramped: more than 12 inches disconnects the two.
In rooms with vaulted or 10+ foot ceilings, you can break the 57-inch rule and hang slightly higher, but not centered on the wall height. Aim for 60-65 inches to the center, keeping the piece visually anchored to the furniture group.
When grouping multiple horizontal pieces, treat them as a single unit. Lay them out on the floor first, maintaining 2-4 inch spacing between frames. Measure the total width and height of the arrangement, then use those dimensions to find the center point for the 57-inch rule.
Always use appropriate hanging hardware. Picture-hanging wire is common but allows tilt. For heavy or wide pieces (over 30 pounds), use two D-rings mounted one-third of the way down from the top edge, with corresponding wall anchors or screws into studs. Wire works for lighter frames under 15 pounds.
DIY Horizontal Wall Decor Projects You Can Try
Floating Shelf with Integrated LED Strip
Cut a piece of ¾-inch maple or poplar to desired length (48-60 inches is manageable). Rout a shallow channel along the underside, ¾ inch from the front edge, using a ¼-inch straight bit. This hides an adhesive-backed LED strip. Sand to 220-grit, apply stain or paint, then polyurethane. Mount with heavy-duty floating shelf brackets (rated for 50+ pounds) screwed into studs. Run low-voltage wiring through the wall or surface-mount with cord covers.
Three-Panel Canvas Print
Many online printing services offer triptych splits of a single image. Order three panels (e.g., 16″ × 20″ each) and hang them with 1-2 inch gaps between. Use a level and painter’s tape to mark positions before driving hangers. This approach is cheaper than a single oversized print and easier to transport.
Reclaimed Wood Plank Installation
Source 1×6 or 1×8 tongue-and-groove pine (actual dimensions: ¾” × 5.5″ or 7.25″). Cut planks to span the wall width using a miter saw. Apply a thin bead of construction adhesive to the back, then secure with 1.5-inch 18-gauge brad nails into studs. Stagger seams for a less uniform look. Finish with satin polyurethane or leave raw for a rustic feel. Wear safety glasses and a dust mask when cutting and sanding.
Fabric-Wrapped Panels
Cut ½-inch MDF or plywood into horizontal rectangles (24″ × 48″ works well). Wrap with canvas drop cloth or upholstery fabric, stapling the edges to the back with a staple gun and ⅜-inch staples. Keep fabric taut to avoid wrinkles. Mount with keyhole hangers or small D-rings. This adds texture without the weight or cost of framed art.
Styling Tips to Maximize Impact
Layer with Lighting
Position picture lights or adjustable track heads to graze the surface of textured pieces. For flat art, aim the light at a 30-degree angle from above to minimize glare. Battery-operated puck lights work for floating shelves without hardwiring.
Use Odd Numbers in Groupings
Three or five pieces feel more dynamic than two or four. When arranging horizontally, keep spacing consistent, 3 inches between frames is a safe default. Vary frame styles slightly (mix wood tones or thin/thick profiles) for visual interest without chaos.
Match Scale to Wall Size
A 16″ × 20″ print looks lost on a 12-foot-wide wall. Go bigger, or group smaller pieces. Conversely, an 80-inch canvas overwhelms a small bedroom. If a single piece feels too large, break it into a multi-panel set for flexibility.
Anchor with Color or Material Contrast
Dark wood shelves pop on white walls: light linen-wrapped panels stand out against navy or charcoal paint. Use the decor to introduce an accent color that appears elsewhere in textiles or furniture. Many design inspiration platforms showcase color pairing strategies.
Don’t Ignore Negative Space
Leaving 8-12 inches of bare wall on either side of a horizontal piece prevents it from looking edge-to-edge crammed. The decor should feel intentional, not like it’s trying to fill every inch. For more budget-friendly styling ideas, consider rotating seasonal decor rather than permanent installations.
Test Before Committing
Cut paper templates to the exact size of your planned decor. Tape them to the wall and live with the layout for a day or two. It’s easier to move painter’s tape than to patch drywall.