Table of Contents
ToggleBathrooms often get the short end of the decorating stick. Homeowners pour effort into kitchens and living rooms, then treat the bathroom like an afterthought, white walls, maybe a mirror, done. But bathroom walls offer untapped potential for turning a utilitarian space into something that feels intentional and polished. Whether working with a powder room, a master bath, or a cramped half-bath, the right wall decor balances moisture resistance with visual impact. This guide walks through practical ideas, installation methods, and material choices that hold up in high-humidity environments.
Key Takeaways
- Bathroom decor wall improvements modernize dated spaces without major renovations and signal homeowner maintenance, boosting resale value.
- Strategic wall decor transforms small bathrooms (35–75 sq ft) by adding depth and visual interest while disguising awkward proportions.
- Sealed or moisture-resistant materials like glass, acrylic, stainless steel, and polyurethane-finished wood prevent warping, mold, and rust in high-humidity environments.
- Floating shelves require proper installation into studs or heavy-duty anchors (toggle bolts rated 50+ pounds) and should be sealed with three coats of marine varnish if wood.
- Frameless mirrors, metal prints, and acrylic-backed artwork outperform traditional paper prints in bathrooms, while fabrics, textiles, and unframed pieces invite mildew damage.
- Running exhaust fans for 20 minutes after showers extends the lifespan of all wall decor materials by preventing steam accumulation and moisture deterioration.
Why Your Bathroom Walls Deserve More Attention
Most bathrooms sit in the 35–75 square feet range, and every vertical surface counts. Bare walls make small spaces feel clinical or unfinished. Strategic decor adds depth, draws the eye upward, and can even disguise awkward proportions, a common issue in older homes where plumbing dictated layout over aesthetics.
Bathrooms also have unique constraints. Steam, splashes, and humidity mean not every material or technique that works in a bedroom translates here. But those challenges don’t rule out creativity. They just demand smarter choices, sealed finishes, moisture-rated substrates, and hardware that won’t rust out in two years.
Another factor: resale value. Updated bathrooms rank high on buyer wishlists, and wall decor upgrades can modernize a dated space without the expense of a full gut job. Even small changes, swapping a builder-grade mirror for framed art or adding floating shelves, signal that a homeowner has maintained the space.
Choosing the Right Wall Decor Style for Your Bathroom
Style starts with function. A powder room used by guests can lean decorative, think bold prints or statement mirrors. A family bathroom needs durability and practicality, so skip delicate textiles and focus on easy-clean surfaces.
Modern minimalism works well in tight quarters. Clean lines, monochrome palettes, and a few carefully chosen pieces prevent visual clutter. Floating shelves with geometric brackets, black-framed prints, and matte black hardware tie the look together.
Coastal or spa-inspired styles suit bathrooms with natural light. Light wood tones, whitewashed frames, and soft blues or greens mimic the calm of a beach house. Pair these with woven baskets or driftwood accents, but ensure any wood elements are sealed against moisture.
Industrial chic translates surprisingly well to bathrooms. Exposed pipe shelving, metal-framed mirrors, and concrete-look finishes create an urban edge. Use pipe fittings rated for indoor use, galvanized steel resists rust better than plain steel.
Traditional or vintage styles benefit from symmetry. Matching sconces flanking a mirror, framed botanical prints, or antique brass fixtures create a timeless feel. If sourcing vintage pieces, inspect them for water damage or mold before installation.
One rule across styles: avoid mixing more than three finishes (brushed nickel, matte black, brass, etc.). Too many metals or textures make a small space feel chaotic.
Top Wall Decor Ideas That Work in Any Bathroom
Framed Art and Prints
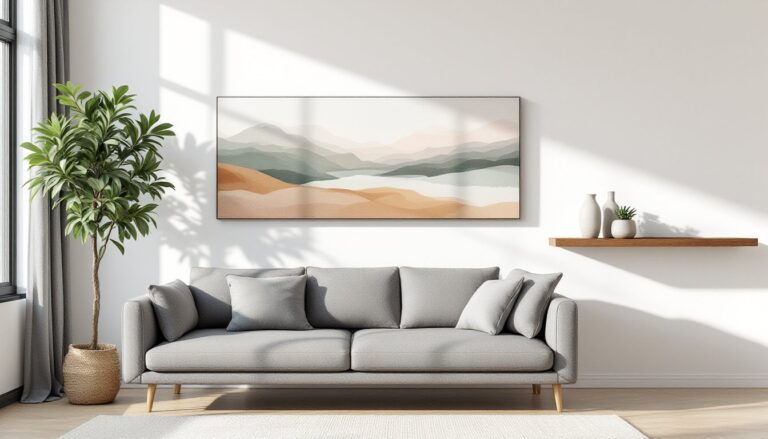
Art in bathrooms gets a bad rap, but it works if you pick the right materials. Avoid original watercolors or anything on unprotected paper, humidity will warp it. Instead, go for sealed prints behind glass in moisture-resistant frames. Aluminum or composite frames hold up better than solid wood, which can swell.
Size matters. A single large piece (16″×20″ or bigger) anchors a wall better than a scattered gallery. If going with multiples, use a grid layout, two rows of three, or four in a square. Asymmetrical arrangements look sloppy in small spaces.
Subject-wise, abstract designs, line drawings, and black-and-white photography suit bathrooms. Steer clear of overly personal family photos unless the bathroom is private. Guests don’t need to see vacation snapshots while washing their hands.
Hang art at least 18 inches away from direct water sources like showers or tubs. Even sealed frames can take a beating from constant steam. In high-moisture areas, consider acrylic prints or metal prints, which hold up better than traditional framed paper.
For a cohesive look, match frame colors to existing fixtures. Black frames pair well with matte black faucets, while natural wood frames complement brass or copper hardware. Designers often use vintage colored fixtures to add character, and framed art should support that palette rather than compete with it.
Floating Shelves and Wall-Mounted Storage
Floating shelves solve two problems: they add visual interest and provide much-needed storage. In bathrooms lacking linen closets, a few well-placed shelves hold towels, toiletries, and decorative items without eating floor space.
Solid wood shelves (poplar, oak, pine) look great but need sealing. Apply three coats of polyurethane or marine-grade varnish to all sides, including the bottom, to prevent moisture absorption. Unsealed wood will warp or develop mold within months.
MDF or particleboard is cheaper but a bad choice for bathrooms. These materials swell and crumble when wet. If budget is tight, go for moisture-resistant MDF or PVC trim boards, which mimic the look of wood but resist water.
Shelf depth depends on use. 6-inch-deep shelves work for small items like candles or rolled washcloths. 10–12 inches accommodate folded towels or baskets. Anything deeper looks bulky in a standard bathroom.
Installation requires finding studs or using appropriate anchors. Standard bathroom drywall is ½-inch thick. For shelves holding more than 10 pounds, screw directly into 16-inch-on-center studs using #8 or #10 wood screws, 2½ inches long. If studs don’t align, use toggle bolts rated for 50+ pounds per anchor.
Style the shelves with intention. Group items in threes, vary heights, and leave negative space. A common mistake is overcrowding, less clutter reads as more luxurious. Mix functional items (a stack of towels, a soap dispenser) with decorative ones (a small plant, a candle).
Wall-mounted storage also includes peg rails, ladder shelves, and magnetic strips for tools like tweezers or nail clippers. These work especially well in small bathrooms where floor space is tight.
How to Install Bathroom Wall Decor Without Damage
Renters and cautious homeowners worry about wall damage, but several methods minimize holes and make removal easier.
Command strips work for lightweight items, up to 5 pounds per strip set, depending on the product line. They’re ideal for small framed prints or plastic shelves. Follow the instructions exactly: clean the wall with rubbing alcohol, wait for it to dry, press firmly for 30 seconds, then wait an hour before hanging. Skipping the wait time is why most Command strip failures happen.
For heavier items, picture hanging strips rated for 16 pounds exist, but in humid environments, adhesive can fail. Test in an inconspicuous spot first.
Adhesive hooks (plastic or metal) handle towels, robes, or small baskets. Again, surface prep matters, wipe down walls with alcohol, not household cleaners that leave residue.
If drilling is acceptable, use the smallest fastener that’ll do the job. For frames under 10 pounds on drywall, a single #6 finish nail leaves a nearly invisible hole that fills with spackle in seconds. Heavier items need anchors.
Plastic drywall anchors (the ribbed ones that tap in with a hammer) hold 20–30 pounds but can pop out under shear load. Self-drilling anchors (metal with coarse threads) handle 50+ pounds and install faster. For the strongest hold without finding studs, use toggle bolts, which expand behind the drywall.
Always locate studs first using a stud finder (magnetic or electronic). Mark stud centers with painter’s tape, less visible than pencil. If you hit a stud, you don’t need an anchor: the screw bites directly into the 1.5-inch-thick lumber (actual dimension of a 2×4 stud).
To prevent tile damage, use carbide-tipped masonry bits when drilling into ceramic or porcelain. Start with a small pilot hole, then step up to the final size. Apply painter’s tape over the drill site to prevent the bit from wandering. Use low speed and light pressure, forcing it cracks tiles.
When removing decor, patch small nail holes with lightweight spackle. For anchor holes, use all-purpose joint compound, apply in layers, and sand smooth once dry. Touch up with matching paint.
Materials That Stand Up to Moisture and Humidity
Bathrooms typically run 50–70% relative humidity during showers, spiking higher in poorly ventilated spaces. Materials that thrive in living rooms can fail here.
Glass and acrylic are top choices. They don’t warp, mold, or rust. Frameless mirrors, acrylic shelving, and glass-enclosed art handle steam without issue. Clean them with a squeegee or microfiber cloth to prevent water spots.
Metal finishes vary in performance. Stainless steel, brass, and powder-coated aluminum resist corrosion. Plain steel or iron will rust unless sealed. If using metal shelving brackets or hooks, confirm they’re rated for wet environments. Marine-grade hardware costs more but lasts.
Sealed wood works if properly finished. As mentioned, apply marine varnish or polyurethane, three coats minimum. Reapply every few years, especially in high-use bathrooms. Teak and cedar have natural oils that resist moisture, but sealing still helps.
PVC and composite materials mimic wood or stone without the moisture risk. PVC trim boards can be painted, cut, and routed like wood but won’t rot. They’re lightweight, easy to install, and ideal for DIY floating shelves.
Canvas prints need protection. Standard canvas absorbs moisture and can develop mold. Opt for UV-coated or laminated canvas designed for kitchens and baths. Some manufacturers offer moisture-resistant canvas specifically for high-humidity spaces.
Fabrics and paper generally don’t belong. Tapestries, unframed prints, and fabric-covered bulletin boards will mildew. If you love a textile look, frame it behind glass or choose a vinyl decal that mimics fabric texture.
Live plants deserve a mention. They’re decor and improve air quality. Pothos, snake plants, and ferns thrive in bathroom humidity. Mount planters with proper drainage or use wall-mounted hydroponic systems. Just ensure adequate light, most bathrooms don’t have enough natural light for photosynthesis, so consider moisture-loving decor alternatives if the space lacks windows.
Paint and wallpaper also count as wall decor. Use bathroom-specific paint (satin or semi-gloss finish with mildewcide) for best moisture resistance. Wallpaper should be vinyl-coated or solid vinyl, which repels water. Peel-and-stick options work but check that the adhesive is rated for humidity.
Ventilation extends the life of any material. Run the exhaust fan during and 20 minutes after showers to clear steam. If there’s no fan, crack a window or door. Even the best materials degrade faster in perpetually damp conditions.